GitHub Integration
Connect your tasks with branches, commits, and pull requests.
In addition to viewing the GitHub files related to the task, you can also go to the GitHub site for more information.
You will also be able to track the status of pull requests via the Producter without going to GitHub.
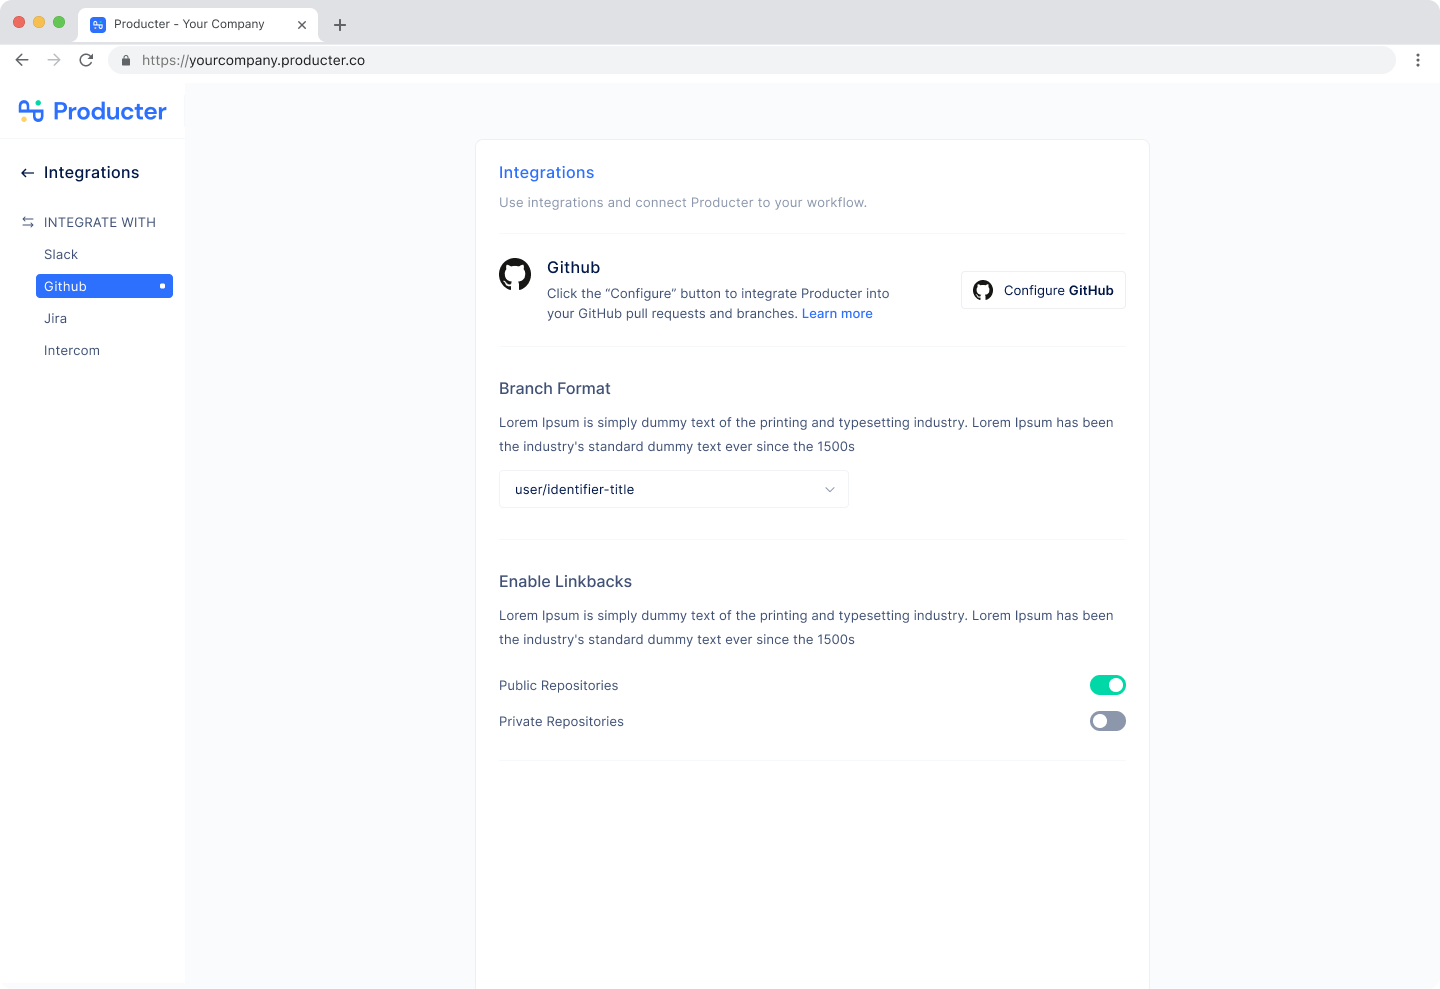
How to integrate GitHub with your workspace
- Click Your Company Name in the sidebar menu. Then, select Workspace Settings.
- Go to Integrations section.
- Find GitHub and click the arrow icon on the right to see Github Integration Settings.
- After, click Connect GitHub button.
- You will be directed to authentication page. Choose the GitHub organization you want to connect with.
- Then, select the repositories you want to.
- Click Install and you're done. 🥳
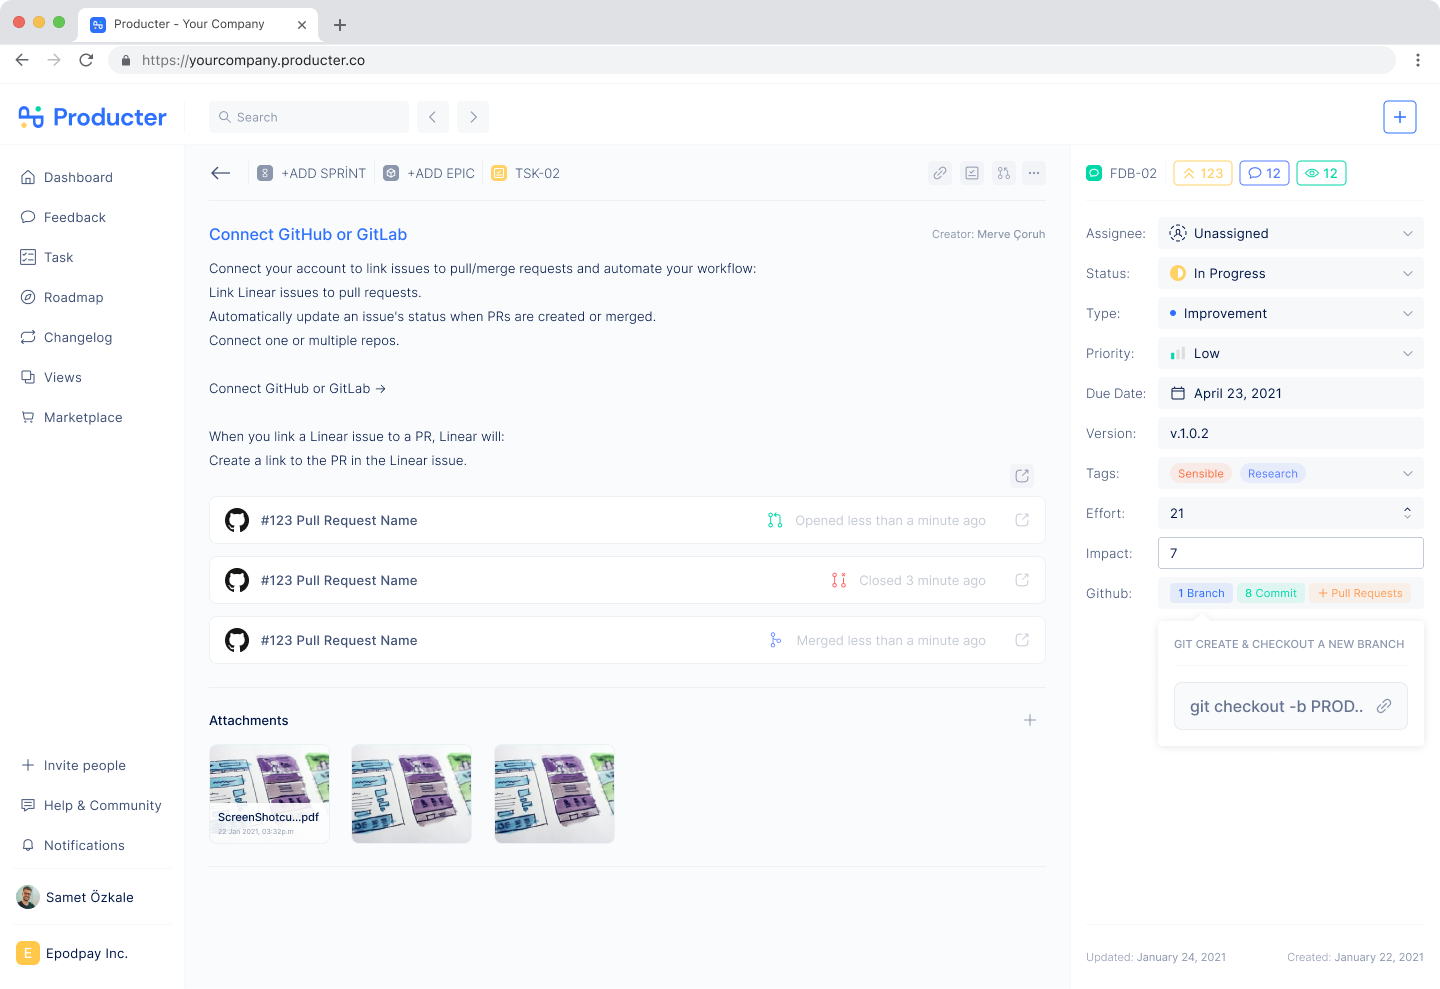
Now you can see the GitHub inputs in the task and epic details. To create branches, you need to copy your task’s name and create a branch with that name.
Branches
On the task detail page, you can access the command to open a branch by clicking '+ Branch' in the right menu.
After creating a branch, when you hover over this button, 2 icons will appear next to it. Plus button shows the required command to open a new branch and the Redirect button is for viewing the opened branch on GitHub.
If you click on the branch button directly, a pop-up opens where you can see the details of the branches of that task.
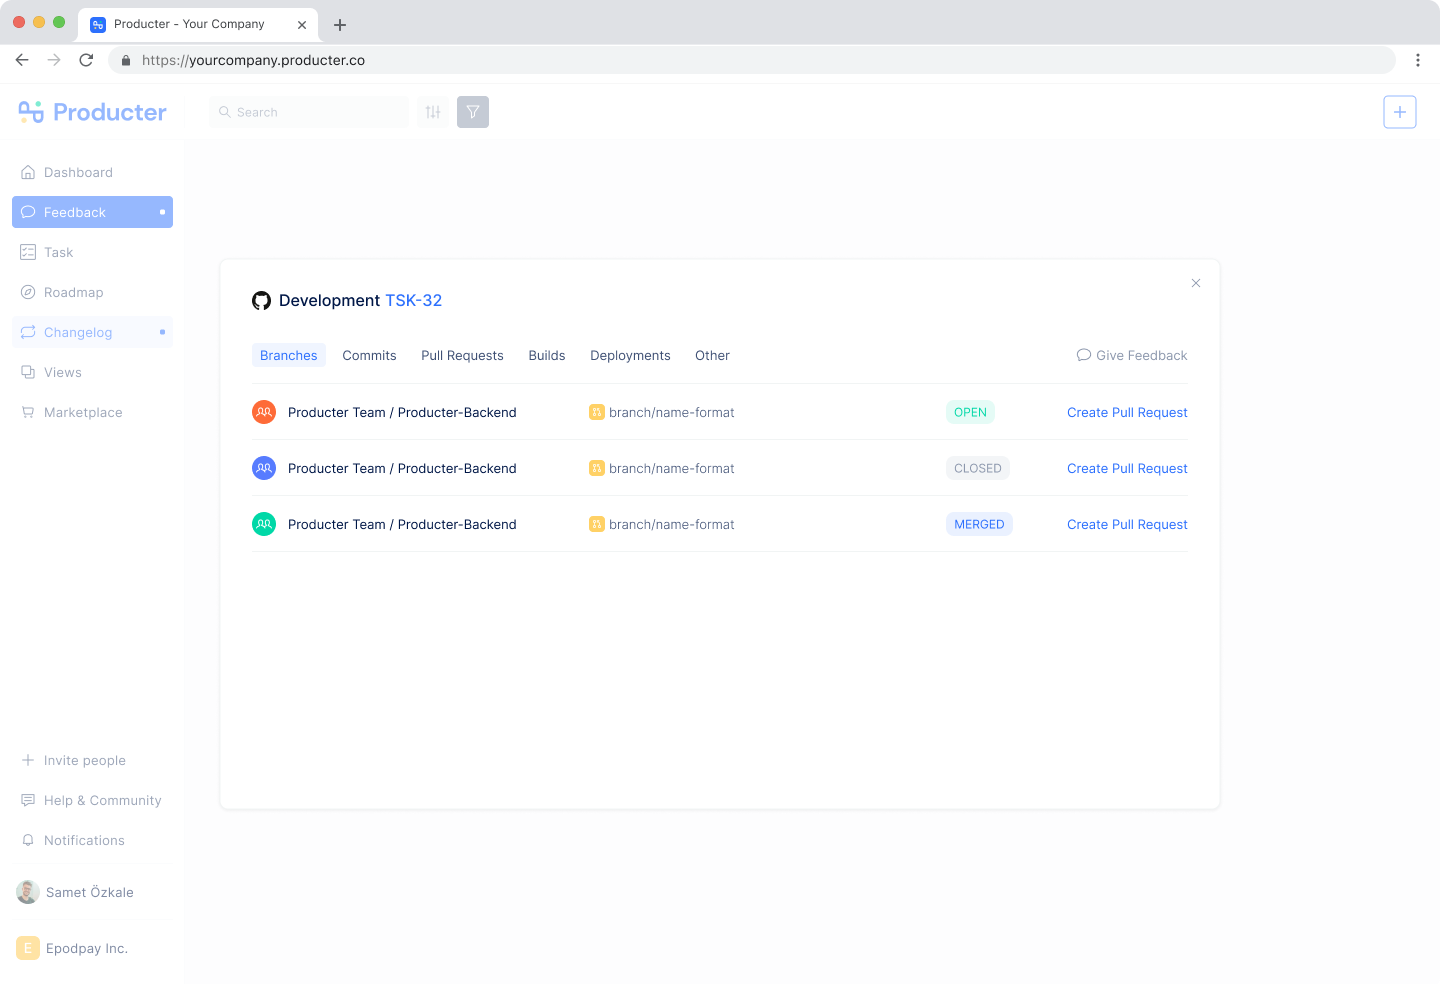
You can access the following information about branches from left to right;
- Repository avatar,
- Organization and Repository name,
- Branch name,
- Branch Status,
- Create Pull Request button.
Commits
On the task detail page, you can access the command to create a commit by clicking '+ Commit' in the right menu.
After creating a commit, when you hover over this button, 2 icons will appear next to it. Plus button shows the required command to open a new commit and Redirect button is for viewing the created commit on GitHub.
If you click on the commit button directly, a pop-up opens where you can see the details of the commits of that task.
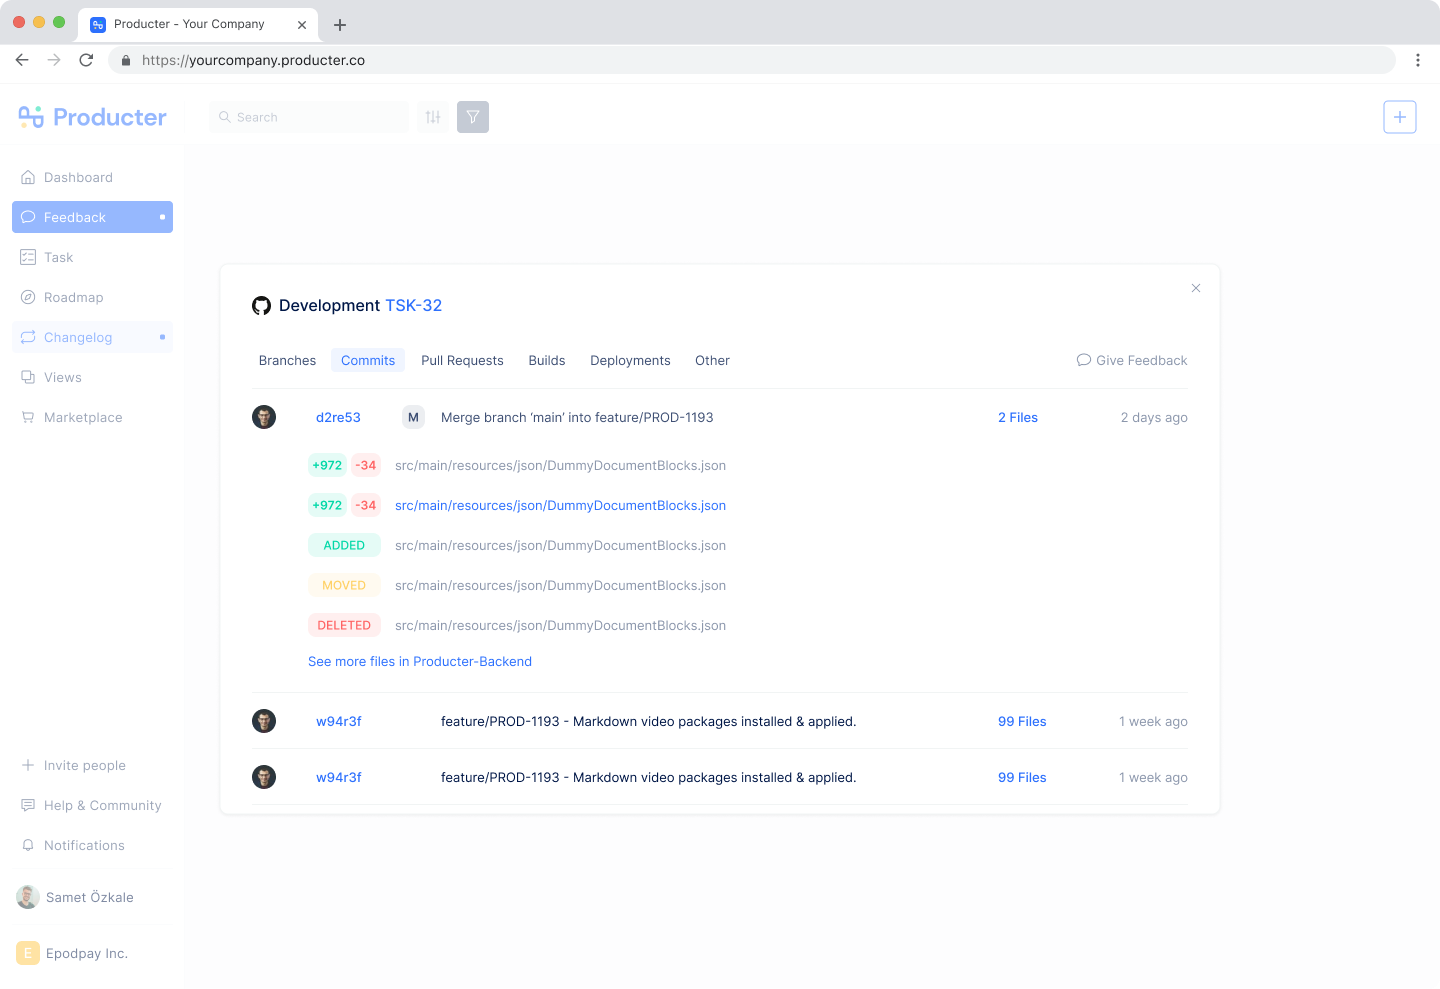
You can access the following information about commits from left to right;
- User who created that commit,
- Commit hash code,
- Commit message,
- Files in that commit,
- Commit date.
Also, you can see the files by clicking on ‘Files’.
Pull Requests
On the task detail page, you can access the command to create a pull by clicking '+ Pull Request' in the right menu.
After creating a pull request, when you hover over this button, 2 icons will appear next to it. Plus button shows the required command to open a new pull request and Redirect button is for viewing the created pull request on GitHub.
If you click on the pull request button directly, a pop-up opens where you can see the details of the pull requests of that task.
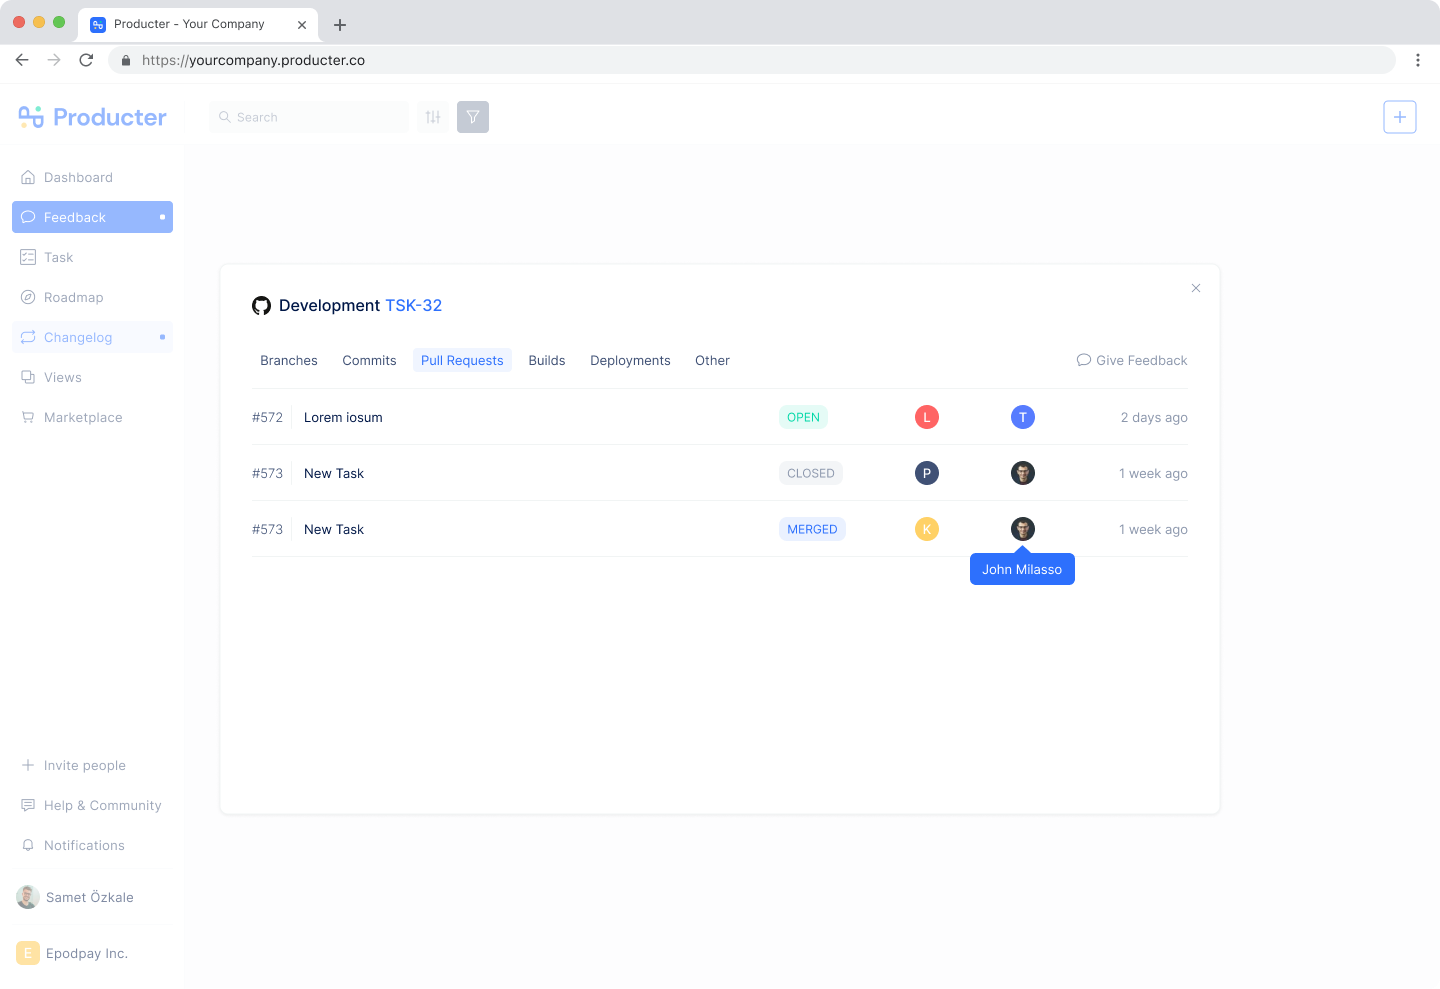
You can access the following information about pull requests from left to right;
- Pull Request ID,
- Pull Request name,
- Pull Request status,
- Creator of Pull Request,
- Reviewer of Pull Request,
- Pull Request Date.
Also, you can see the files by clicking on ‘Files’.
Also, you can see your pull requests below the task description.