
Jira Integration

Our Jira Integration allows you to try Producter while keeping up-to-date projects in Jira.
This integration enables you to synchronize your Jira project with your Producter workspace and view them in one place. It also allows you to link tasks in Producter to existing Jira issues, and have changes to the Jira issue automatically reflected in Producter.
How to integrate Jira with your workspace
--Screen Studio--Integrating Part--
- Click Your Company Name in the sidebar menu. Then, select Workspace Settings.
- Go to Integrations section.
- Find Jira and click the arrow icon on the right to see Jira Integration Settings.
- After, click Add to Jira button.
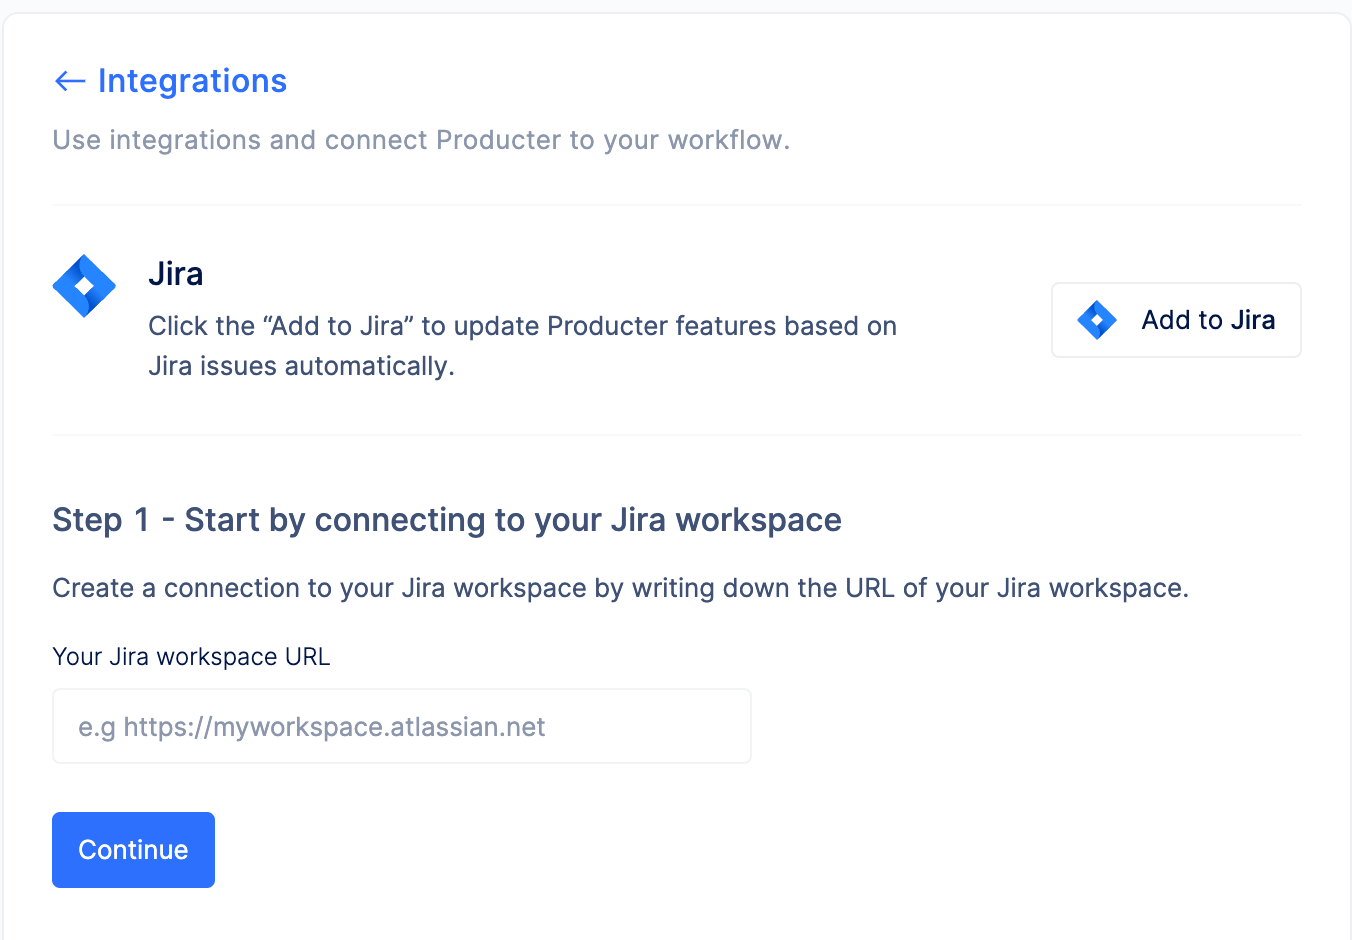
Step 1
For Step 1, you need to write the URL of your Jira Workspace in the input.
Example: https://myworkspace.atlassian.net
Step 2
Ensure your Jira account has access to Producter by following the steps below.
- Open your Jira Security settings.
- Click on Create API Token.
- Label your token (e.g. Producter).
- Click on Create button.
- Copy the token.
- Enter your Jira account email to the first input.
- Paste the API token generated by Jira to the second input.
- Click the Continue button.
After the installation, you must select the Jira Project you want to link with Producter.
Configure Jira Integration
2-Way Sync
2-Way Sync provides automatically syncing feature data between Producter and Jira when there’s a change on either platform.
Check the checkbox if you want to enable 2-Way Sync.
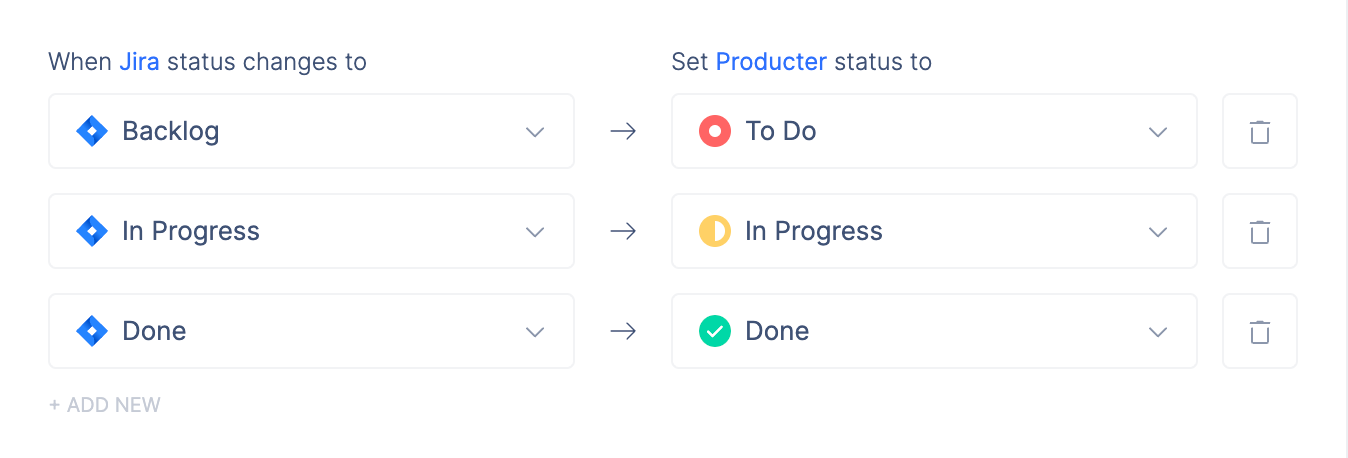
Status Mapping
Status mapping allows you to match Jira statuses to Producter statuses.
Click the +Add New button for mapping statuses that have not yet been mapped to Producter.
Field Mapping
You can define field-to-field relationships with field mapping. Connect the right data when pushing a new feature.
If you don't want to sync certain fields with Jira, you can remove them.

Issue Type Mapping
Through issue type mapping, you can connect your Jira issue types that are relevant to this integration in Producter.
Remember, Producter issue types can be mapped to more than one Jira issue type.

By following these steps, you should be able to set up a reliable and efficient two-way integration between Producter and Jira that will save you time and improve the productivity of your team.
How to Use Jira Integration
--Screen Studio--Pushing Jira
Once you have configured the integration settings, you can test the integration by creating a new task in Producter and making sure it is synced to Jira.
You can push Producter tasks to Jira by clicking the +Push to Jira button on the task detail page.
You can see the pushed issue in Jira after pushing it to Jira by clicking on See the details button.
Additionally, you don't have to create a new Jira issue for every pushing task. Instead of creating a new Jira issue, you can select an existing issue when pushing to Jira.
Frequently Asked Questions
Will the issues we created in Jira be reflected directly on Producter?
Yes. Thanks to 2-Way Sync, issues created in Jira can be shown in Producter automatically.